
Mozilla ThunderBird Email Client Setup
1. Open TunderBird.

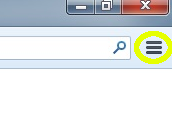
2. Open the Thunderbird menu by clicking this icon:

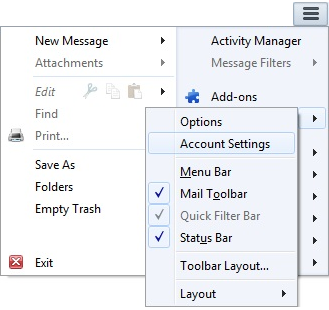
3. Highlight "Options" and click "Account Settings"
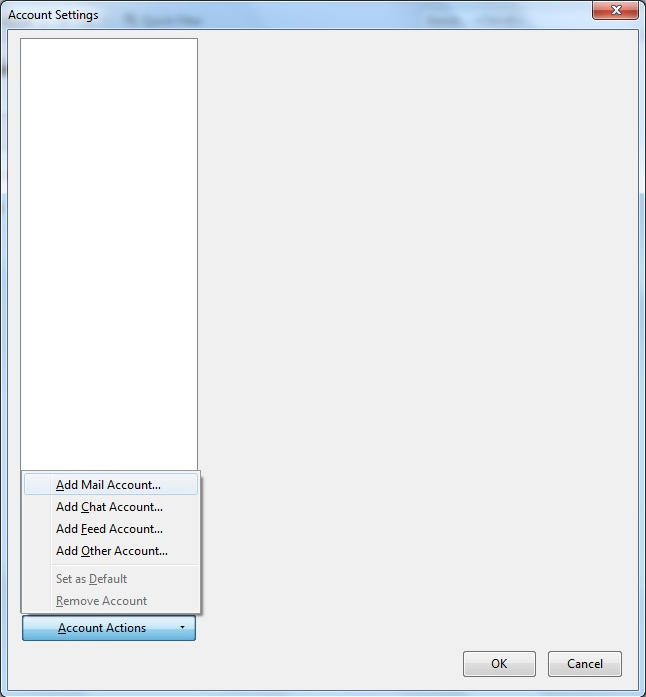
4. Click on the "Account Actions" drop-down box and select "Add Mail Account..."
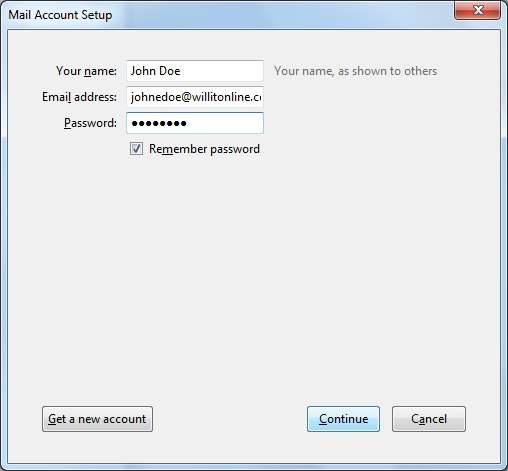
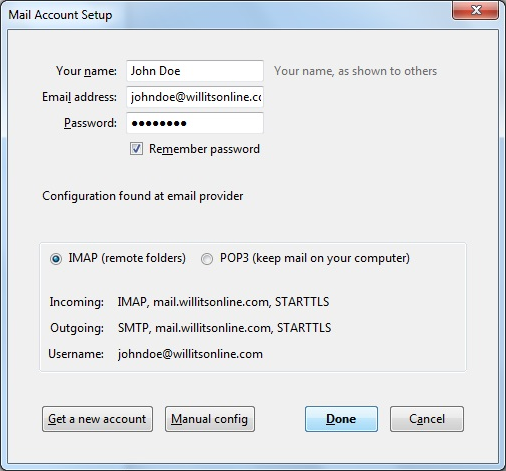
5. Enter your account information:
Put your first and last name into the "Your Name:" field.
Put your WillitsOnline email address into the "Email Address:" field.
Put your password into the "Password:" field.
Click the "Continue" button.
6. Thunderbird will automatically obtain all the correct settings. Click "Done" to finish setting up your account
Your email is now set up.
Try to email yourself to make sure everything is working correctly.